Extension: Installation
OHIF-v3 provides the ability to utilize external extensions. In this document we will describe how to add/install external extensions.
Our long-term plan is to make OHIF-v3 capable of installing extensions from
npmwith a command line. Until then, please use the instructions below to manually install extensions.
Installing an Extension#
1) Extension Files Copy#
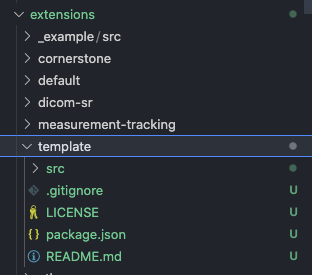
We use a Template Extension repository to describe the necessary steps to use a new extension. You can use this repository as a starting point to create your own extension.
As you can see in the extension code base, folders structure are similar to the
OHIF-maintained extensions. Let's look at our Template Extension:
src/index.js: The most important file in any extension. This file is where extensions' authors hav defined the extension modules, lifecycle hooks, and other configurations.
For instance the Template Extension has the following modules which will be
registered in OHIF by Extension Manager
Each extension has an ID which is used to register the extension in OHIF. For
instance, for the Template Extension, the extension ID is
extension.template.
export default { id: 'extension.template', getPanelModule, getCommandsModule,};Package.json#
Extension package name is defined in the package.json file. The package.json
file is a JSON file that defines the extension name, version, and dependencies.
For instance for the Template extension, the package.json file looks like
this:
{ "name": "@ohif/extension-template", "version": "1.0.0", "description": "A template extension to show extension installation", ...}Note 1: We will use the @ohif/extension-template inside OHIF to let OHIF know
about existence of this extension.
Note 2: You don't need to use the @ohif scope for your extensions. You can use
any scope you want.
Note 3: Although folders names are not important and the package.json file
contains the mode name, we recommend to use the same name as the folder name.
2) Configuring OHIF#
There are couple of places inside OHIF which we need to modify in order to add the extension. The following lines of code should be added to the OHIF:
Viewer's package.json#
/* ... */"dependencies": { /* ... */ "@babel/runtime": "7.7.6", "@ohif/core": "^2.5.1", "@ohif/extension-cornerstone": "^2.4.0", "@ohif/extension-measurement-tracking": "^0.0.1", "@ohif/extension-template": "^0.0.1", /* ... */}index.js#
/* ... */import OHIFMeasurementTrackingExtension from '@ohif/extension-measurement-tracking';import OHIFDICOMSRExtension from '@ohif/extension-dicom-sr';import OHIFTemplateExtension from '@ohif/extension-template';
const appProps = { config: window ? window.config : {}, defaultExtensions: [ OHIFDefaultExtension, OHIFCornerstoneExtension, OHIFMeasurementTrackingExtension, OHIFDICOMSRExtension, OHIFTemplateExtension, ],};/* ... */After you followed the above steps, you should run yarn install in the root
folder of the OHIF repository to install the registered extension.
Now you have added the extension to the OHIF, and its modules (layout, commands,
panels, toolbars, hangingProtocols, etc.) are made available to the OHIF
modes. Read more on how to consume extensions
here
Congrats! 🎉